Hej Kochani!
Dziś mam dla Was coś specjalnego - kurs na kartkę parawanową.
Aby przygotować taką kartkę potrzebujecie:
- arkusz papieru bazowego format A4
(u mnie biały o gramaturze 250 g)
- arkusz papieru scrapowego 30x30 cm
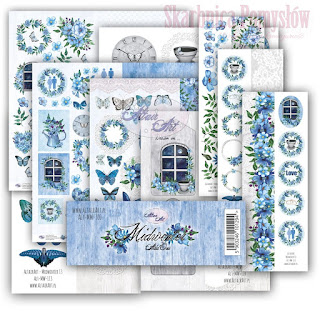
(u mnie arkusz z kolekcji "Midwinter")
- dodatki do dekoracji - np. scrapki, tekturki, koronki,
gaza, dodatki do wycięcia (u mnie dodatki z kolekcji "Midwinter")
- mata
- nożyk do cięcia
- bigownica
- bigownica
- klej
- coś do dystansowania (kosteczki 3d, beermata, taśma 3d)
- metalowa linijka
Hello Friends!
Today I have something special for you - a tutorial for a screen card.
To make a screen card you need:
- A4 base paper sheet (I have white one)
- scrap paper sheet 30x30 cm
(I have a sheet from "Midwinter" collection
(I have a sheet from "Midwinter" collection
- decoration accessories - e.g. cardboard, lace, add ons to cut
(I used add-ons from "Midwinter" collection)
(I used add-ons from "Midwinter" collection)
- mat to cut
- cutting knife
- score board
- score board
- glue
- 3d tape or something to distance
- metal ruler
Na początek przycinamy biały arkusz papieru do wymiarów 20x15 cm.
Jeśli macie, można do tego użyć gilotyny lub trymera. Jest to baza naszej kartki.
At the beginning, we cut a white sheet of paper to 20x15 cm.
You can use guillotine or trimmer. This is the base of our card.
You can use guillotine or trimmer. This is the base of our card.
Następnie za pomocą nożyka i metalowej linijki
nacinamy bazę kartki dwiema poziomymi liniami
na wysokości 5 i 10 cm w odległości 2,5 cm od brzegów kartki.
Potem bigujemy bazę pionowo na 5, 10 i 15 cm wzdłuż całej kartki
oraz na 2,5 cm i 17,5 cm między nacięciami.
Potem bigujemy bazę pionowo na 5, 10 i 15 cm wzdłuż całej kartki
oraz na 2,5 cm i 17,5 cm między nacięciami.
Linie nacięć i bigowania możecie zobaczyć na poniższym schemacie.
Next, using a knife and metal ruler we cut the base with two horizontal lines
at a height of 5 and 10 cm at a distance of 2,5 cm from the edges of the paper.
Then we score the base vertically to 5, 10 and 15 cm along the entire page
and at 2,5 cm and 17,5 cm between the cuts.
You can see the lines of cuts and scoring in the picture below.
Tak wygląda nacięta i zbigowana baza.
This is how the cut and scored base looks.
Zginamy bazę wg linii bigowania naprzemiennie tak,
aby uzyskać efekt jak na zdjęciu. Tak wygląda
gotowa baza kartki parawanowej.
We bend the base according to the scoring line alternately,
to get the effect as in the picture. This is how ready screen card base looks like.
We bend the base according to the scoring line alternately,
to get the effect as in the picture. This is how ready screen card base looks like.
Kolejnym krokiem jest oklejenie bazy papierem scrapowym.
Ja użyłam arkusza nr 02 o wymiarach 30x30 cm z kolekcji "Midwinter".
Docinamy kawałki papieru odpowiedniej wielkości
i oklejamy bazę kolorowym papierem.
Next step is covering the base with scrapbooking paper.
I used paper no. 02 from "Midwinter" collection.
We cut pieces of paper of the right size and cover the base
with scrapbooking paper.
Next step is covering the base with scrapbooking paper.
I used paper no. 02 from "Midwinter" collection.
We cut pieces of paper of the right size and cover the base
with scrapbooking paper.
Teraz pozostało już tylko udekorować kartkę.
Pamiętajcie, aby elementy znajdujące się w środku kartki parawanowej
nie wystawały poza obszar bazy, ponieważ nie będzie można
złożyć kartki na płasko i włożyć jej do koperty.
Ja przygotowałam kartkę ślubną i do jej dekoracji użyłam
elementy do wycięcia z kolekcji, tekturki, obrączki oraz scrapki.
Tak przedstawia się gotowa praca.
Now, all you have to do is decorate the card.
Remember, that the elements inside the screen card
shouldn't protrude beyond the base area. I made a wedding card
and I used add-ons from collection, cardboards and wedding rings
to decorate it. This is the finished screen card.
Now, all you have to do is decorate the card.
Remember, that the elements inside the screen card
shouldn't protrude beyond the base area. I made a wedding card
and I used add-ons from collection, cardboards and wedding rings
to decorate it. This is the finished screen card.
Kartkę możecie złożyć na płasko i włożyć do koperty lub pudełka.
Jak podobał się Wam kurs? Czy jest dla Was czytelny i zrozumiały?
You can fold the card flat and put it into a box or envelope.
How do you like the course? Is it easy to understand for you?
You can fold the card flat and put it into a box or envelope.
How do you like the course? Is it easy to understand for you?
Papiery/Papers:
Ściskam Was mocno,
Hugs,
Monika


Kursik cudowny, a karteczka prezentuję się obłędnie.:)
OdpowiedzUsuńCudowna praca 😍
OdpowiedzUsuńDziękuję Aniu :)
UsuńPiękna kartka. Wykorzystam, właśnie w planach mam zrobienie kartki ślubnej. Dziękuję za zrozumiały kurs.
OdpowiedzUsuńDziękuję i bardzo się cieszę, że kurs się przyda :)
UsuńPięknie wyszło ❤️💙♥️
OdpowiedzUsuńParawan zrobil w albumie takiego giganta ale muszę go jakiś poprawić bo coś mi się nie podoba😅